A Detailed 7-Day Meal Plan for a High Protein Diet
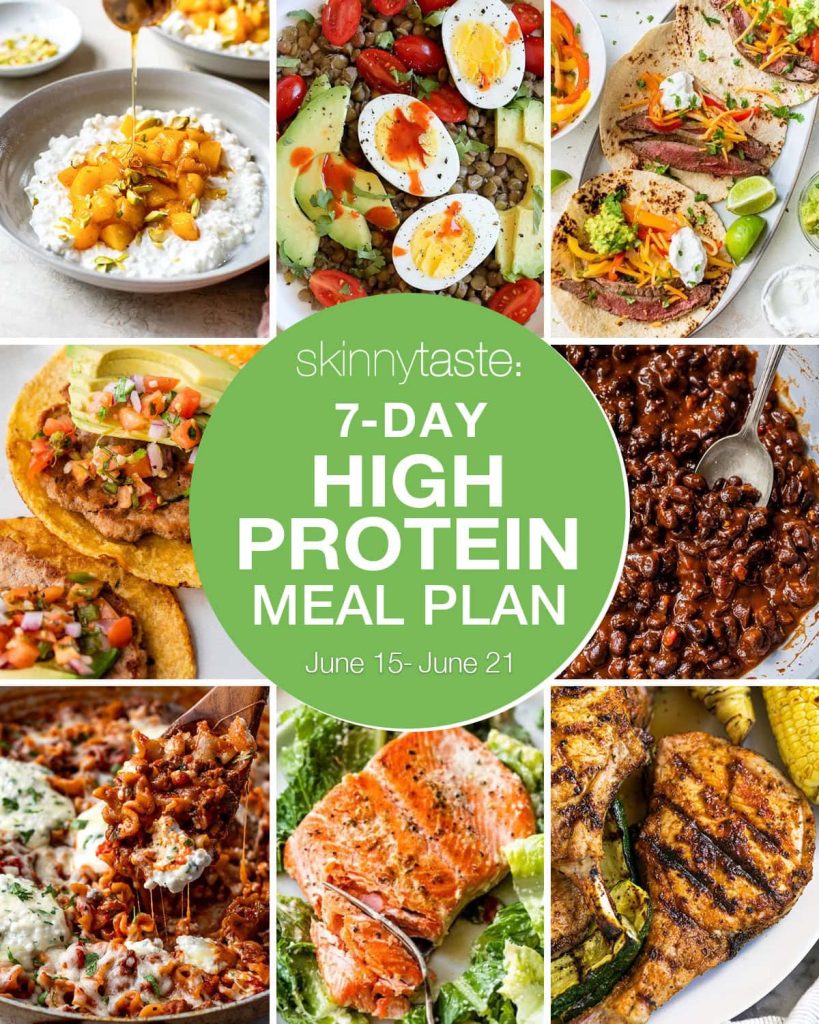
**A Detailed 7-Day High Protein Diet Meal Plan**
Adopting a high-protein diet can support muscle development, facilitate weight loss, and promote overall well-being. This 7-day meal plan aims to deliver a well-rounded consumption of protein, carbohydrates, and fats, making sure you obtain essential nutrients while prioritizing high-protein options.
**Day 1:**
– **Breakfast:** Eggs scrambled with spinach and feta, whole-grain toast, and a serving of mixed berries.
– **Lunch:** Salad with grilled chicken, mixed greens, cherry tomatoes, cucumbers, and balsamic vinaigrette.
– **Dinner:** Salmon baked with quinoa and steamed broccoli.
– **Snack:** Greek yogurt accompanied by a handful of almonds.
**Day 2:**
– **Breakfast:** Overnight oats with chia seeds, garnished with banana slices and a spoonful of peanut butter.
– **Lunch:** Turkey and avocado wrap using whole-grain tortilla, lettuce, and tomatoes.
– **Dinner:** Stir-fried beef with bell peppers, onions, and brown rice.
– **Snack:** Cottage cheese paired with pineapple pieces.
**Day 3:**
– **Breakfast:** Spinach protein smoothie with protein powder, almond milk, and almond butter.
– **Lunch:** Lentil soup paired with a slice of whole-grain bread.
– **Dinner:** Tacos made with grilled shrimp, cabbage slaw, and avocado.
– **Snack:** Edamame seasoned with sea salt.
**Day 4:**
– **Breakfast:** Omelet filled with mushrooms, bell peppers, and cheddar cheese.
– **Lunch:** Quinoa salad featuring black beans, corn, diced tomatoes, and lime dressing.
– **Dinner:** Chicken breast baked with roasted sweet potatoes and asparagus.
– **Snack:** Hard-boiled eggs.
**Day 5:**
– **Breakfast:** Pancakes made from whole grains topped with fresh berries and served with turkey bacon.
– **Lunch:** Tuna salad mixed with greens, cherry tomatoes, and lemon vinaigrette.
– **Dinner:** Pork chops served with mashed cauliflower and green beans.
– **Snack:** Protein bar.
**Day 6:**
– **Breakfast:** Chia pudding crafted with almond milk, topped with sliced almonds and strawberries.
– **Lunch:** Wrap filled with grilled vegetables and hummus.
– **Dinner:** Turkey meatballs served with spaghetti squash and marinara sauce.
– **Snack:** Sliced apple with almond butter.
**Day 7:**
– **Breakfast:** Whole-grain bagel topped with smoked salmon, cream cheese, and capers.
– **Lunch:** Chicken Caesar salad featuring romaine lettuce, parmesan cheese, and croutons.
– **Dinner:** Steak grilled with roasted Brussels sprouts and quinoa.
– **Snack:** A combination of mixed nuts.
**Advice for Success:**
1. **Stay Hydrated:** Consume ample water throughout the day to maintain hydration and support metabolic functions.
2. **Watch Portions:** Keep an eye on portion sizes to prevent overeating, even with nutritious foods.
3. **Plan Ahead:** Meal prep in advance to save time and ensure adherence to the plan.
4. **Diversify:** Include a range of protein sources to guarantee a variety of nutrients and avoid meal monotony.
This meal plan serves as a guide and can be tailored to meet personal dietary requirements and preferences. Always seek advice from a healthcare professional or nutritionist before undertaking major dietary changes.
Creamy Caesar Pasta Salad Recipe for Fast Summer Dishes
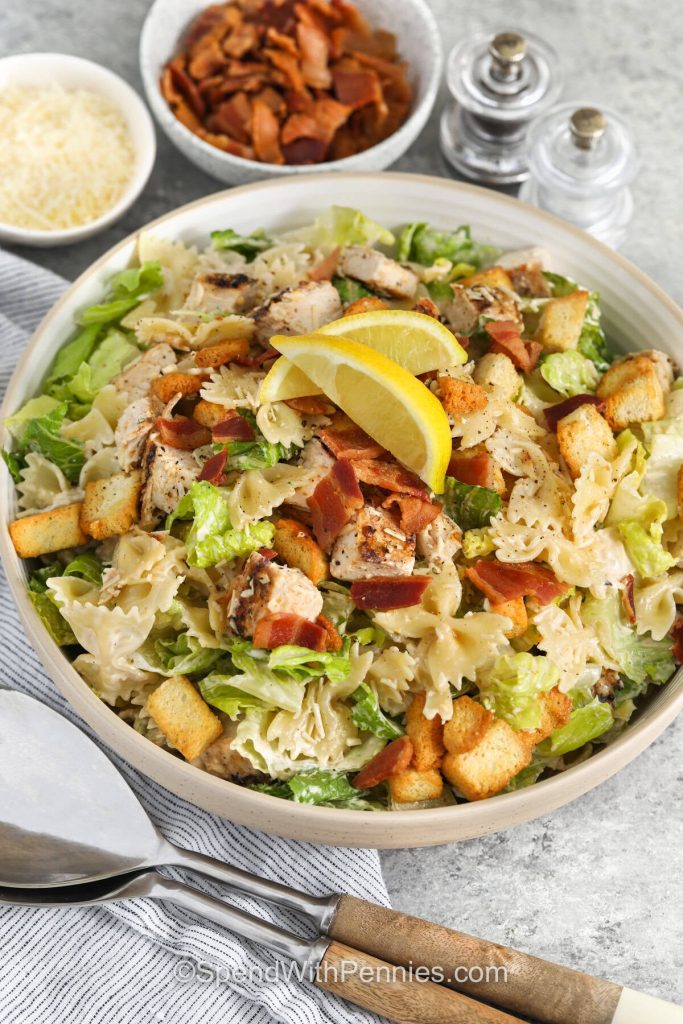
# Chicken Caesar Pasta Salad
The Chicken Caesar Pasta Salad merges tender pasta, crisp romaine, Parmesan cheese, bacon, and rich Caesar dressing for a simple meal that’s ideal for lunches, potlucks, and dinners on warm evenings. If you love Caesar salad, this more substantial variation is set to become your new favorite!
## Holly’s Recipe Highlights: Chicken Caesar Pasta Salad
– **Flavor**: This salad offers the traditional savory, tangy taste of Caesar salad combined with substantial pasta, smoky bacon, and crunchy croutons.
– **Prep Note**: Start with the dressing to allow the garlic, lemon, Parmesan, and anchovy flavors to blend as you prepare the salad.
– **Time-Saving Tip**: Opt for rotisserie chicken, pre-made Caesar dressing, or cooked bacon for quicker and simpler preparation.
**Total Time**: 30 Mins
**Servings**: 8
**Cooking Method**: Stovetop/Grilled
## Ingredients for Chicken Caesar Pasta Salad
– **Farfalle Pasta**: This shape holds creamy dressing effectively and provides a hearty bite. You can also use rotini, penne, or medium shells as alternatives.
– **Romaine Lettuce**: Romaine provides the traditional crisp crunch of Caesar salad but can be substituted with iceberg or little gem. Chop right before serving and ensure it’s completely dry to keep it fresh and crunchy.
– **Croutons**: Utilize store-bought croutons or easily prepare your own homemade variety.
– **Bacon**: Bacon lends a smoky, salty flavor to the salad. Use leftover cooked oven bacon or bacon bits, or skip it for a lighter option.
– **Anchovy Paste**: This contributes the distinctive savory Caesar flavor without imparting a fishy taste. It can be reduced or left out, but the dressing will lose some of its punch.
– **Mayo and Yogurt**: Mayonnaise gives the dressing a creamy texture and helps it adhere to the pasta. Greek yogurt or sour cream lightens it while maintaining a tangy richness. Use more Greek yogurt and less mayonnaise for a zestier dressing.
– **Chicken**: Chicken breasts are optional for a side dish, but they make this pasta salad a full meal.
## How to Make Chicken Caesar Pasta Salad
1. Prepare the Caesar dressing first and refrigerate it.
2. Cook the pasta until al dente, then rinse it under cold water.
3. Season and grill the chicken, allowing it to cool before chopping.
4. In a large bowl, combine the pasta, chicken, romaine, bacon, Parmesan, and croutons.
5. Pour in the dressing and serve with lemon wedges.
### Tips for Perfect Pasta Salad
– **Cook Al Dente**: Preparing the pasta al dente ensures it maintains its shape after dressing.
– **Rinse After Cooking**: Rinsing the pasta under cold water halts cooking and prevents it from becoming mushy in the salad.
– **Let the Chicken Cool**: Allow the chicken to cool completely before adding, so the lettuce remains crisp and doesn’t wilt.
– **Make-Ahead Salad**: If preparing in advance, wait to add the romaine and croutons until serving to avoid sogginess.
– **Double the Dressing**: This dressing is so delightful that I enjoy doubling it! Save the extra for Caesar salads, wraps, or grilled chicken later in the week.
## Storing Pasta Salad
Store leftovers in an airtight container in the refrigerator for up to 4 days. For optimal texture, keep the romaine and croutons separate if making ahead. If the salad has already been mixed with lettuce and croutons, it’s best consumed within 1 to 2 days to prevent the lettuce from wilting and the croutons from losing their crunch. This salad does not freeze well.
### More Creamy Pasta Salads
Did you enjoy this Chicken Caesar Pasta Salad Recipe? Please leave a comment and rating below.
Zesty Honey-Enhanced Cheese and Egg Recipe
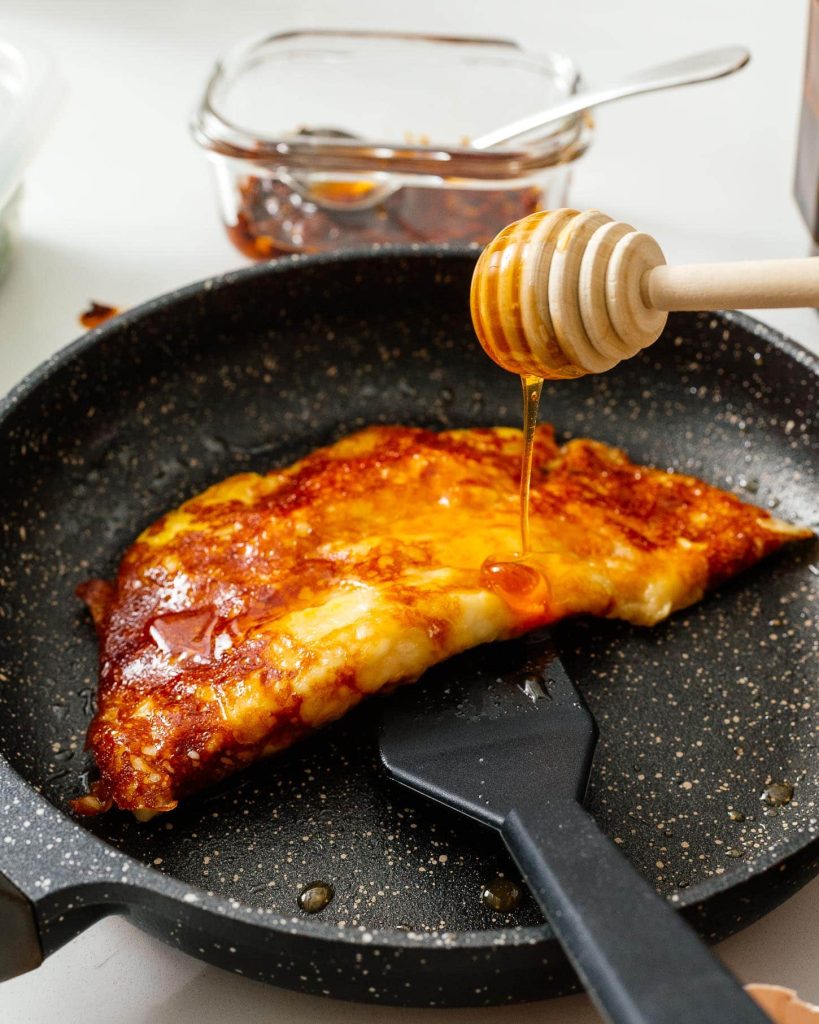
# These Spicy Honey Cheese Eggs Are Unbelievably So Tasty That You’ll Find Yourself Making Them Again and Again
If you haven’t tried mozzarella that’s been melted in a skillet, you must do so right away. It becomes melty and stretchy and caramelizes in a perfectly delightful manner, enveloping your sunny side up eggs in a cheesy embrace. The gentle hint of spicy honey elevates it all. It’s everything I desire for breakfast.
## Crunchy Cheese Eggs
I have adored crunchy cheese eggs ever since 2015. Mike and I have been blogging for so long that past trends are making their way back. Who would have guessed that plaid shirts would return? I certainly didn’t. Regardless, cheese eggs are incredible: a crunchy, caramelized cheese skirt atop a flawlessly cooked egg? Protein on protein? Tell me more 😍
I am a fan of eggs, and discovering new methods to prepare them always excites me. (Sorry, not sorry, I had to) Punny jokes aside, eggs provide an excellent source of protein, and when combined with stretchy, melty mozzarella and sweet and spicy honey, these three elements transform into something far greater than the sum of their parts.
## What Are Spicy Honey Cheese Eggs?
Spicy honey cheese eggs resemble an over-easy egg on a bed of hot honey and crunchy cheese. Specifically, hot honey is drizzled in a skillet, followed by shredded mozzarella, then sunny side up eggs atop. Cover and cook, fold in half, and finish with additional hot honey or even some chili crisp.
## How to Create Spicy Honey Cheese Eggs
1. **Honey.** Take a non-stick skillet. Over medium heat, drizzle in some hot honey.
2. **Cheese.** Place a generous layer of shredded mozzarella cheese.
3. **Eggs.** Crack two eggs directly on the cheese and season with salt and pepper to your preference.
4. **Cover.** Place a lid on the skillet and cook the eggs until the whites are set and the cheese is beginning to brown and caramelize.
5. **Fold.** Use a spatula to loosen the cheesy base and fold the eggs in half. If desired, cook a little longer for the yolks to reach your preferred doneness.
6. **Savor.** Remove from the skillet and savor your cheesy, sweet-n-spicy eggs right away.
## Spicy Honey Cheese Egg Ingredients
– **Hot Honey:** Hot honey is trending right now, and I, for one, am enjoying the sweet-heat phenomenon everywhere. Mike’s Hot Honey is the most recognized brand of hot honey available, but as with all popular items, there’s a vast array to choose from.
– **Cheese:** Shredded mozzarella cheese works best here. The mild flavor and meltiness of mozzarella allows the hot honey to shine while caramelizing beautifully.
– **Eggs:** Yes, please, eggs. If your budget permits, opt for a local free-range or organic egg; the taste difference can be quite significant.
## Sweet and Savory Eggs
There’s a reason why so many irresistible foods combine sweet and savory. It’s because it appeals to two of our taste sensations, and the contrast makes it even more intriguing to our palates. The sweetness of the honey alongside the savoriness of the cheese and eggs complements each other perfectly. Add a touch of spicy heat, and your brain goes wild. These eggs embody the perfect blend of sweet, savory, and spicy. Moreover, they also provide the advantage of differing textures: the crunch of the caramelized cheese and the softness of the egg yolks.
## My Spicy Honey Egg Tips and Tricks
– **Don’t Overdo the Honey:** You might be inclined to cover the bottom of the skillet with hot honey, but exercise moderation. Excessive honey will prevent the cheese from properly adhering to the skillet, and the cheese won’t caramelize effectively.
– **Choose the Right Pan:** It’s essential to use a non-stick skillet. I believe every egg should have a dedicated pan meant solely for eggs. Non-stick ensures that the cheese and eggs release smoothly, even without oil. It’s a bonus if your non-stick pan comes with a glass lid so you can monitor the cooking process of your eggs.
## If You Enjoy Eggs, Consider These Recipes
Enjoy your spicy honey egging!
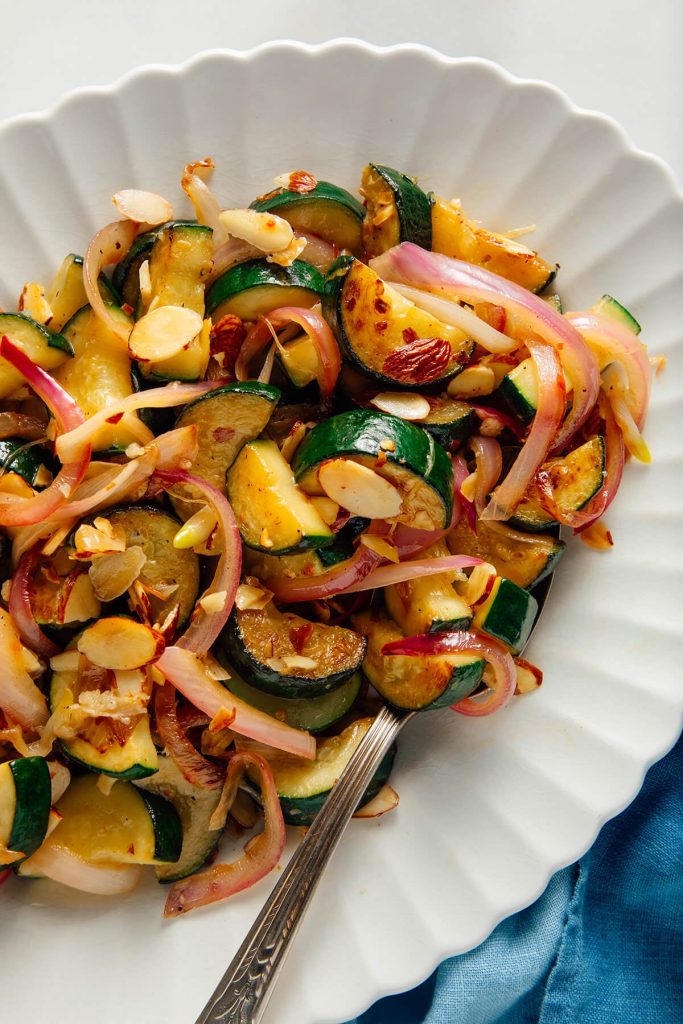
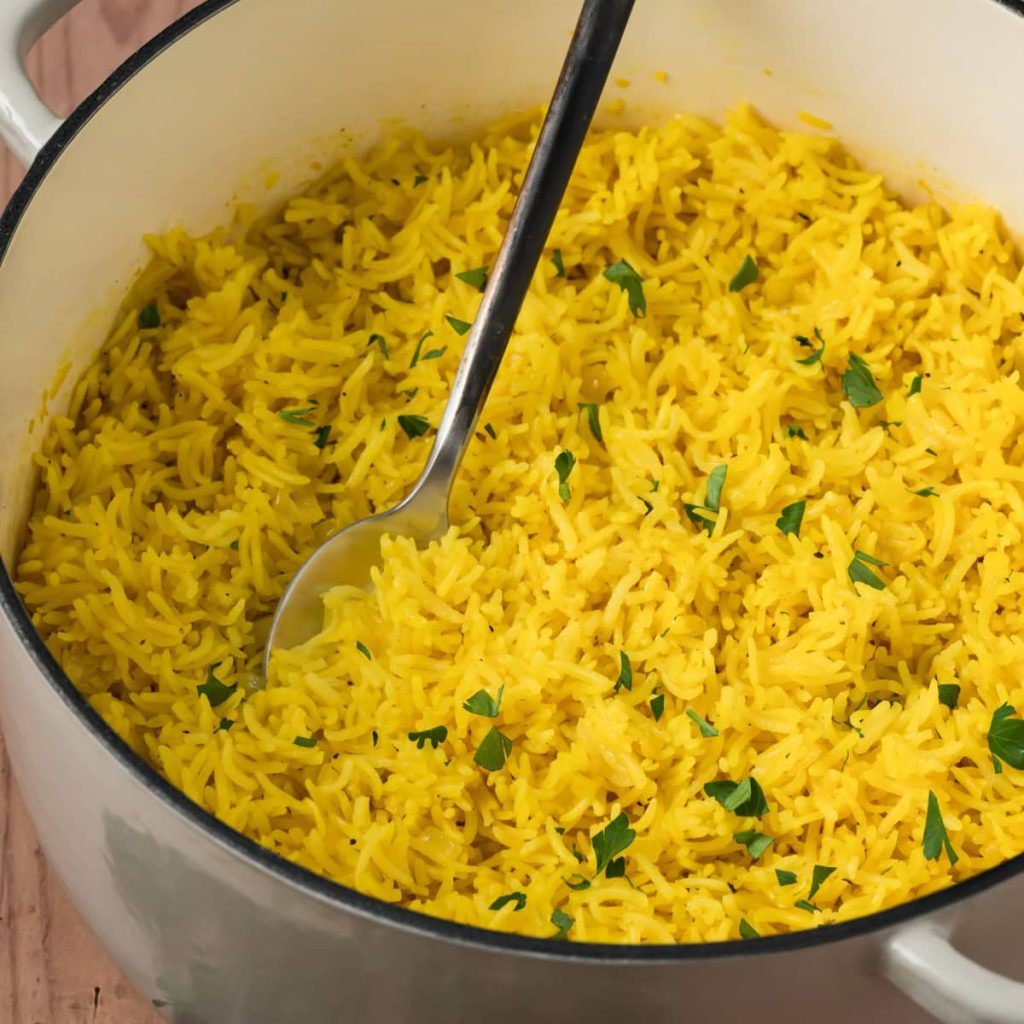
Turmeric-Enhanced Rice Recipe
**Discovering Culinary Journeys with The Wanderlust Kitchen**
In the hustle and bustle of today’s world, the pleasure of cooking and the excitement of travel can sometimes seem unattainable. Yet, Linda, the visionary behind The Wanderlust Kitchen, encourages you to take a plunge into a voyage that merges both interests. With a goal to bring forth genuine recipes and travel memories from around the world, Linda’s platform acts as a portal to culinary discovery and cultural appreciation.
### A Tribute to International Cuisines
At The Wanderlust Kitchen, recipes transcend mere ingredient lists; they tell tales that embody the diverse heritage of food from numerous cultures. Linda underscores the value of authenticity in her culinary creations, ensuring that each recipe honors its roots while seamlessly blending in contemporary techniques and ingredients. This methodology enables home cooks to savor the tastes of far-off places without ever stepping outside their kitchens.
### Confidence in Culinary Skills
A defining characteristic of The Wanderlust Kitchen is Linda’s dedication to empowering her audience. She maintains that anyone can prepare delectable dishes with assurance, no matter their cooking experience. By supplying straightforward instructions, useful tips, and captivating stories, Linda simplifies the culinary process, making it approachable and enjoyable for all. Whether you are an experienced cook or just starting, her recipes inspire innovation and imagination.
### Journey Through Cuisine
Food possesses an extraordinary capacity to whisk us away to various locations, and Linda taps into this potential by combining her recipes with travel tales and insights. Each meal is paired with stories from her escapades, providing readers a window into the customs and traditions that influence the food. This distinctive fusion of cuisine and travel motivates readers not only to recreate meals but also to venture into new realms and experiences.
### Promoting Culinary Exploration
Linda’s motto, “Be adventurous and try a new recipe and travel somewhere you have never been before,” deeply resonates with her followers. The Wanderlust Kitchen stands as a reminder that cooking can itself be an expedition. By urging readers to venture beyond their familiar territories, Linda nurtures a spirit of curiosity and enthusiasm towards discovering new tastes and methods.
### Conclusion
The Wanderlust Kitchen is much more than a mere recipe website; it is a commemoration of the link between culinary delights and travel. Through her authentic recipes and engaging narratives, Linda invites you to explore the globe from your kitchen. So, whether you wish to create a classic meal from Italy or delve into street food from Thailand, The Wanderlust Kitchen is your ticket to a culinary expedition. Bon Appétit! Bon Voyage!

A Detailed 7-Day Meal Plan for a High Protein Diet
**A Detailed 7-Day High Protein Diet Meal Plan**
Adopting a high-protein diet can support muscle development, facilitate weight loss, and promote overall well-being. This 7-day meal plan aims to deliver a well-rounded consumption of protein, carbohydrates, and fats, making sure you obtain essential nutrients while prioritizing high-protein options.
**Day 1:**
– **Breakfast:** Eggs scrambled with spinach and feta, whole-grain toast, and a serving of mixed berries.
– **Lunch:** Salad with grilled chicken, mixed greens, cherry tomatoes, cucumbers, and balsamic vinaigrette.
– **Dinner:** Salmon baked with quinoa and steamed broccoli.
– **Snack:** Greek yogurt accompanied by a handful of almonds.
**Day 2:**
– **Breakfast:** Overnight oats with chia seeds, garnished with banana slices and a spoonful of peanut butter.
– **Lunch:** Turkey and avocado wrap using whole-grain tortilla, lettuce, and tomatoes.
– **Dinner:** Stir-fried beef with bell peppers, onions, and brown rice.
– **Snack:** Cottage cheese paired with pineapple pieces.
**Day 3:**
– **Breakfast:** Spinach protein smoothie with protein powder, almond milk, and almond butter.
– **Lunch:** Lentil soup paired with a slice of whole-grain bread.
– **Dinner:** Tacos made with grilled shrimp, cabbage slaw, and avocado.
– **Snack:** Edamame seasoned with sea salt.
**Day 4:**
– **Breakfast:** Omelet filled with mushrooms, bell peppers, and cheddar cheese.
– **Lunch:** Quinoa salad featuring black beans, corn, diced tomatoes, and lime dressing.
– **Dinner:** Chicken breast baked with roasted sweet potatoes and asparagus.
– **Snack:** Hard-boiled eggs.
**Day 5:**
– **Breakfast:** Pancakes made from whole grains topped with fresh berries and served with turkey bacon.
– **Lunch:** Tuna salad mixed with greens, cherry tomatoes, and lemon vinaigrette.
– **Dinner:** Pork chops served with mashed cauliflower and green beans.
– **Snack:** Protein bar.
**Day 6:**
– **Breakfast:** Chia pudding crafted with almond milk, topped with sliced almonds and strawberries.
– **Lunch:** Wrap filled with grilled vegetables and hummus.
– **Dinner:** Turkey meatballs served with spaghetti squash and marinara sauce.
– **Snack:** Sliced apple with almond butter.
**Day 7:**
– **Breakfast:** Whole-grain bagel topped with smoked salmon, cream cheese, and capers.
– **Lunch:** Chicken Caesar salad featuring romaine lettuce, parmesan cheese, and croutons.
– **Dinner:** Steak grilled with roasted Brussels sprouts and quinoa.
– **Snack:** A combination of mixed nuts.
**Advice for Success:**
1. **Stay Hydrated:** Consume ample water throughout the day to maintain hydration and support metabolic functions.
2. **Watch Portions:** Keep an eye on portion sizes to prevent overeating, even with nutritious foods.
3. **Plan Ahead:** Meal prep in advance to save time and ensure adherence to the plan.
4. **Diversify:** Include a range of protein sources to guarantee a variety of nutrients and avoid meal monotony.
This meal plan serves as a guide and can be tailored to meet personal dietary requirements and preferences. Always seek advice from a healthcare professional or nutritionist before undertaking major dietary changes.
Read More
Creamy Caesar Pasta Salad Recipe for Fast Summer Dishes
# Chicken Caesar Pasta Salad
The Chicken Caesar Pasta Salad merges tender pasta, crisp romaine, Parmesan cheese, bacon, and rich Caesar dressing for a simple meal that’s ideal for lunches, potlucks, and dinners on warm evenings. If you love Caesar salad, this more substantial variation is set to become your new favorite!
## Holly’s Recipe Highlights: Chicken Caesar Pasta Salad
– **Flavor**: This salad offers the traditional savory, tangy taste of Caesar salad combined with substantial pasta, smoky bacon, and crunchy croutons.
– **Prep Note**: Start with the dressing to allow the garlic, lemon, Parmesan, and anchovy flavors to blend as you prepare the salad.
– **Time-Saving Tip**: Opt for rotisserie chicken, pre-made Caesar dressing, or cooked bacon for quicker and simpler preparation.
**Total Time**: 30 Mins
**Servings**: 8
**Cooking Method**: Stovetop/Grilled
## Ingredients for Chicken Caesar Pasta Salad
– **Farfalle Pasta**: This shape holds creamy dressing effectively and provides a hearty bite. You can also use rotini, penne, or medium shells as alternatives.
– **Romaine Lettuce**: Romaine provides the traditional crisp crunch of Caesar salad but can be substituted with iceberg or little gem. Chop right before serving and ensure it’s completely dry to keep it fresh and crunchy.
– **Croutons**: Utilize store-bought croutons or easily prepare your own homemade variety.
– **Bacon**: Bacon lends a smoky, salty flavor to the salad. Use leftover cooked oven bacon or bacon bits, or skip it for a lighter option.
– **Anchovy Paste**: This contributes the distinctive savory Caesar flavor without imparting a fishy taste. It can be reduced or left out, but the dressing will lose some of its punch.
– **Mayo and Yogurt**: Mayonnaise gives the dressing a creamy texture and helps it adhere to the pasta. Greek yogurt or sour cream lightens it while maintaining a tangy richness. Use more Greek yogurt and less mayonnaise for a zestier dressing.
– **Chicken**: Chicken breasts are optional for a side dish, but they make this pasta salad a full meal.
## How to Make Chicken Caesar Pasta Salad
1. Prepare the Caesar dressing first and refrigerate it.
2. Cook the pasta until al dente, then rinse it under cold water.
3. Season and grill the chicken, allowing it to cool before chopping.
4. In a large bowl, combine the pasta, chicken, romaine, bacon, Parmesan, and croutons.
5. Pour in the dressing and serve with lemon wedges.
### Tips for Perfect Pasta Salad
– **Cook Al Dente**: Preparing the pasta al dente ensures it maintains its shape after dressing.
– **Rinse After Cooking**: Rinsing the pasta under cold water halts cooking and prevents it from becoming mushy in the salad.
– **Let the Chicken Cool**: Allow the chicken to cool completely before adding, so the lettuce remains crisp and doesn’t wilt.
– **Make-Ahead Salad**: If preparing in advance, wait to add the romaine and croutons until serving to avoid sogginess.
– **Double the Dressing**: This dressing is so delightful that I enjoy doubling it! Save the extra for Caesar salads, wraps, or grilled chicken later in the week.
## Storing Pasta Salad
Store leftovers in an airtight container in the refrigerator for up to 4 days. For optimal texture, keep the romaine and croutons separate if making ahead. If the salad has already been mixed with lettuce and croutons, it’s best consumed within 1 to 2 days to prevent the lettuce from wilting and the croutons from losing their crunch. This salad does not freeze well.
### More Creamy Pasta Salads
Did you enjoy this Chicken Caesar Pasta Salad Recipe? Please leave a comment and rating below.
Read More
Zesty Honey-Enhanced Cheese and Egg Recipe
# These Spicy Honey Cheese Eggs Are Unbelievably So Tasty That You’ll Find Yourself Making Them Again and Again
If you haven’t tried mozzarella that’s been melted in a skillet, you must do so right away. It becomes melty and stretchy and caramelizes in a perfectly delightful manner, enveloping your sunny side up eggs in a cheesy embrace. The gentle hint of spicy honey elevates it all. It’s everything I desire for breakfast.
## Crunchy Cheese Eggs
I have adored crunchy cheese eggs ever since 2015. Mike and I have been blogging for so long that past trends are making their way back. Who would have guessed that plaid shirts would return? I certainly didn’t. Regardless, cheese eggs are incredible: a crunchy, caramelized cheese skirt atop a flawlessly cooked egg? Protein on protein? Tell me more 😍
I am a fan of eggs, and discovering new methods to prepare them always excites me. (Sorry, not sorry, I had to) Punny jokes aside, eggs provide an excellent source of protein, and when combined with stretchy, melty mozzarella and sweet and spicy honey, these three elements transform into something far greater than the sum of their parts.
## What Are Spicy Honey Cheese Eggs?
Spicy honey cheese eggs resemble an over-easy egg on a bed of hot honey and crunchy cheese. Specifically, hot honey is drizzled in a skillet, followed by shredded mozzarella, then sunny side up eggs atop. Cover and cook, fold in half, and finish with additional hot honey or even some chili crisp.
## How to Create Spicy Honey Cheese Eggs
1. **Honey.** Take a non-stick skillet. Over medium heat, drizzle in some hot honey.
2. **Cheese.** Place a generous layer of shredded mozzarella cheese.
3. **Eggs.** Crack two eggs directly on the cheese and season with salt and pepper to your preference.
4. **Cover.** Place a lid on the skillet and cook the eggs until the whites are set and the cheese is beginning to brown and caramelize.
5. **Fold.** Use a spatula to loosen the cheesy base and fold the eggs in half. If desired, cook a little longer for the yolks to reach your preferred doneness.
6. **Savor.** Remove from the skillet and savor your cheesy, sweet-n-spicy eggs right away.
## Spicy Honey Cheese Egg Ingredients
– **Hot Honey:** Hot honey is trending right now, and I, for one, am enjoying the sweet-heat phenomenon everywhere. Mike’s Hot Honey is the most recognized brand of hot honey available, but as with all popular items, there’s a vast array to choose from.
– **Cheese:** Shredded mozzarella cheese works best here. The mild flavor and meltiness of mozzarella allows the hot honey to shine while caramelizing beautifully.
– **Eggs:** Yes, please, eggs. If your budget permits, opt for a local free-range or organic egg; the taste difference can be quite significant.
## Sweet and Savory Eggs
There’s a reason why so many irresistible foods combine sweet and savory. It’s because it appeals to two of our taste sensations, and the contrast makes it even more intriguing to our palates. The sweetness of the honey alongside the savoriness of the cheese and eggs complements each other perfectly. Add a touch of spicy heat, and your brain goes wild. These eggs embody the perfect blend of sweet, savory, and spicy. Moreover, they also provide the advantage of differing textures: the crunch of the caramelized cheese and the softness of the egg yolks.
## My Spicy Honey Egg Tips and Tricks
– **Don’t Overdo the Honey:** You might be inclined to cover the bottom of the skillet with hot honey, but exercise moderation. Excessive honey will prevent the cheese from properly adhering to the skillet, and the cheese won’t caramelize effectively.
– **Choose the Right Pan:** It’s essential to use a non-stick skillet. I believe every egg should have a dedicated pan meant solely for eggs. Non-stick ensures that the cheese and eggs release smoothly, even without oil. It’s a bonus if your non-stick pan comes with a glass lid so you can monitor the cooking process of your eggs.
## If You Enjoy Eggs, Consider These Recipes
Enjoy your spicy honey egging!
Read More

Turmeric-Enhanced Rice Recipe
**Discovering Culinary Journeys with The Wanderlust Kitchen**
In the hustle and bustle of today’s world, the pleasure of cooking and the excitement of travel can sometimes seem unattainable. Yet, Linda, the visionary behind The Wanderlust Kitchen, encourages you to take a plunge into a voyage that merges both interests. With a goal to bring forth genuine recipes and travel memories from around the world, Linda’s platform acts as a portal to culinary discovery and cultural appreciation.
### A Tribute to International Cuisines
At The Wanderlust Kitchen, recipes transcend mere ingredient lists; they tell tales that embody the diverse heritage of food from numerous cultures. Linda underscores the value of authenticity in her culinary creations, ensuring that each recipe honors its roots while seamlessly blending in contemporary techniques and ingredients. This methodology enables home cooks to savor the tastes of far-off places without ever stepping outside their kitchens.
### Confidence in Culinary Skills
A defining characteristic of The Wanderlust Kitchen is Linda’s dedication to empowering her audience. She maintains that anyone can prepare delectable dishes with assurance, no matter their cooking experience. By supplying straightforward instructions, useful tips, and captivating stories, Linda simplifies the culinary process, making it approachable and enjoyable for all. Whether you are an experienced cook or just starting, her recipes inspire innovation and imagination.
### Journey Through Cuisine
Food possesses an extraordinary capacity to whisk us away to various locations, and Linda taps into this potential by combining her recipes with travel tales and insights. Each meal is paired with stories from her escapades, providing readers a window into the customs and traditions that influence the food. This distinctive fusion of cuisine and travel motivates readers not only to recreate meals but also to venture into new realms and experiences.
### Promoting Culinary Exploration
Linda’s motto, “Be adventurous and try a new recipe and travel somewhere you have never been before,” deeply resonates with her followers. The Wanderlust Kitchen stands as a reminder that cooking can itself be an expedition. By urging readers to venture beyond their familiar territories, Linda nurtures a spirit of curiosity and enthusiasm towards discovering new tastes and methods.
### Conclusion
The Wanderlust Kitchen is much more than a mere recipe website; it is a commemoration of the link between culinary delights and travel. Through her authentic recipes and engaging narratives, Linda invites you to explore the globe from your kitchen. So, whether you wish to create a classic meal from Italy or delve into street food from Thailand, The Wanderlust Kitchen is your ticket to a culinary expedition. Bon Appétit! Bon Voyage!
Read More
Revised Black Bean Confetti Salad Recipe
### Black Bean Confetti Salad 2.0: A Spring Treat
Spring represents a time of rejuvenation, and what better method to honor it than with a colorful and refreshing salad? The Black Bean Confetti Salad 2.0 is a revised take on a cherished favorite that unites a lively assortment of ingredients, ideal for any event. This salad is not just visually striking but also loaded with nutrients, making it an excellent addition to your meal collection.
#### Ingredients
To whip up this delightful salad, you will need the subsequent ingredients:
– 2 (15-ounce) cans black beans, rinsed and drained
– 3 bell peppers (a variety of colors), diced
– 1 to 2 jalapeños, finely chopped (to taste)
– 1/4 large or half a medium white onion, finely chopped
– A handful of radishes, finely chopped (watermelon radish works wonderfully)
– 4 tablespoons (60 ml) olive oil
– Juice from 1 to 2 limes (to taste)
– Kosher salt
– Chili powder or tajín (a mix of chili powder, lime, and salt)
– Approximately 1/2 cup fresh cilantro, chopped
– 2 firm-ripe avocados, peeled and diced
– Tortilla chips for serving (optional)
#### Instructions
1. **Mix the Base Ingredients**: In a large bowl, combine the black beans, diced bell peppers, chopped jalapeños, onion, and radishes.
2. **Dress the Salad**: Pour the olive oil over the mixture, add the juice of one lime, and season with 1 teaspoon of kosher salt and chili powder or tajín to your liking.
3. **Incorporate Freshness**: Carefully fold in the chopped cilantro and diced avocado.
4. **Taste and Modify**: Taste the salad and modify the seasoning, adding more lime juice or salt as required.
5. **Serve**: Enjoy the salad right away, using tortilla chips to scoop it up. Leftovers can be kept in the refrigerator for a few days.
#### Nutritional Benefits
This salad is not just tasty but also healthy. Black beans are a fantastic source of protein and fiber, while the vibrant bell peppers and radishes deliver vital vitamins and antioxidants. The inclusion of avocado contributes healthy fats, making this salad a balanced dish.
#### Versatility
The Black Bean Confetti Salad 2.0 is remarkably adaptable. It can function as a party snack, a side dish, or even a light lunch. Pair it with quesadillas for a fulfilling dinner or take it to gatherings for a nutritious option that everyone will appreciate.
#### Conclusion
With its vivid colors and fresh tastes, the Black Bean Confetti Salad 2.0 is a wonderful way to usher spring into your kitchen. Whether you’re savoring it at a picnic or as a quick lunch, this salad is guaranteed to lift your spirits and nourish your body.
Read More
How to Prepare a Strawberry Daiquiri
**Virgin Variation: A Refreshing Non-Alcoholic Beverage**
The Virgin Variation is an enjoyable non-alcoholic drink that mixes the sweetness of frozen strawberries with the zest of lime juice and the fizz of tonic water or lemon-lime soda. This invigorating beverage is ideal for those desiring a fruity, alcohol-free alternative. Here’s how to create it:
**Ingredients:**
– 12 ounces (2 cups) frozen strawberries
– ¼ cup simple syrup
– 3 tablespoons lime juice
– 1 cup tonic water or lemon-lime soda
– ½ to ¾ cup water
– 1 cup ice
**Instructions:**
1. In a blender, blend the frozen strawberries, simple syrup, lime juice, tonic water or lemon-lime soda, water, and ice.
2. Mix until smooth and thoroughly combined.
3. Taste and modify the sweetness with additional simple syrup if preferred.
4. Pour into glasses and, if desired, add another splash of tonic water or soda for increased fizz.
5. Serve right away and savor the refreshing flavors.
**Fruity Variations:**
For those inclined to try out different flavors, the Virgin Variation can be easily modified by adding other fruits. By substituting half of the strawberries with another frozen fruit, you can create various fruity mixes. Here are some suggestions:
1. **Pineapple Strawberry Blend:** Substitute half the strawberries with frozen pineapple for a tropical flair. The pineapple contributes a sweet and tangy flavor that complements the strawberries nicely.
2. **Mango Strawberry Blend:** Replace half the strawberries with frozen mango. This mix provides a creamy consistency and a rich, sweet taste that pairs well with the lime juice and soda.
3. **Peach Strawberry Blend:** Use frozen peaches instead of half the strawberries for a smooth, sweet variation. The peaches introduce a subtle flavor that enhances the overall fruitiness of the drink.
When exploring these fruity variations, ensure to balance the flavors by adjusting the simple syrup quantity to your preference. This guarantees the drink remains perfectly sweet and refreshing.
Whether you opt for the traditional Virgin Variation or experiment with one of the fruity twists, this beverage is destined to be a favorite at any event or as a personal indulgence. Relish the vibrant flavors and the refreshing experience of this delightful non-alcoholic drink.
Read More
An In-Depth Manual to 50 Summer Beverages and Cooling Cocktails
Recipes from Alex & Sonja
Introducing Alex and Sonja Overhiser, the vibrant pair behind the well-loved food blog, A Couple Cooks. As authors of cookbooks, busy parents, and a real couple who enjoys cooking together, Alex and Sonja have been expressing their love for food since 2010. Their blog serves as a valuable source of straightforward, seasonal recipes, healthy meal planning suggestions, and the pure pleasure of cooking, all created with care and tested by their two children.
The Path of A Couple Cooks
Alex and Sonja’s culinary adventure commenced with a straightforward wish to eat healthier and in a more sustainable manner. Over time, they have refined their culinary abilities and developed a talent for crafting recipes that are not only tasty but also approachable for home chefs of varying expertise. Their cooking philosophy centers around fresh, whole ingredients and a harmony of flavors that make each dish enjoyable to prepare and savor.
Easy and Seasonal Recipes
Central to A Couple Cooks is a dedication to ease and seasonality. Alex and Sonja hold the belief that the finest meals are created with ingredients that are in season and at their flavor peak. Their recipes are crafted to be simple, featuring clear directions and minimal hassle, enabling anyone to whip up a delicious meal without spending hours in the kitchen.
Healthy Meal Preparation Tips
Alongside their recipes, Alex and Sonja share insightful tips on healthy meal preparation. They recognize the difficulties of juggling a hectic lifestyle with the aim of eating well, and they offer practical guidance on how to design meals that are nourishing, satisfying, and quick to make. From batch cooking to efficient grocery shopping, their advice helps alleviate the pressure of mealtime.
The Delight of Cooking Together
For Alex and Sonja, cooking transcends being merely a practical activity; it’s a delightful experience that unites individuals. They inspire couples, families, and friends to come together in the kitchen and create lasting memories through a mutual love of food. Their recipes are intended to be prepared collaboratively, nurturing connection and teamwork in the kitchen.
Cookbook Authors and Beyond
Apart from their blog, Alex and Sonja have penned cookbooks that further delve into their culinary philosophy. These volumes are packed with additional recipes and insights, providing readers with a more profound exploration of their cooking world. Each recipe is thoroughly tested and beautifully captured, ensuring that readers possess all the resources they require to thrive in the kitchen.
Whether you are an experienced cook or just beginning your journey, Alex and Sonja’s recipes cater to everyone. With their emphasis on ease, seasonality, and the joy of cooking, A Couple Cooks stands as a reliable resource for anyone wishing to prepare delicious, healthy meals at home.
Read More
How to Prepare Cashew Cream
Recipes by Alex & Sonja: A Culinary Adventure
Introducing Alex and Sonja Overhiser, the energetic pair behind the cherished food blog, A Couple Cooks. Since 2010, this real-life couple has been sharing their culinary enthusiasm through straightforward, seasonal recipes that infuse joy into the kitchen. As authors of cookbooks and busy parents, Alex and Sonja appreciate the significance of crafting meals that are not only tasty but also simple to make, making them ideal for families and individuals alike.
Their journey commenced with a mutual passion for food and a quest to encourage others to enjoy home cooking. Over time, A Couple Cooks has evolved into a reliable resource for those looking for healthy meal planning tips and culinary inspiration. Each recipe is carefully developed and photographed by Alex and Sonja, guaranteeing that readers have a clear and appealing guide to follow.
An intriguing element of their blog is the participation of their two children in the recipe testing process. This family-driven approach not only adds a level of authenticity to their creations but also ensures that the dishes are approved by kids. From hearty breakfasts to fulfilling dinners, each recipe is crafted to cater to a broad spectrum of tastes and dietary choices.
Alex and Sonja’s dedication to utilizing seasonal ingredients is apparent in their recipes, which showcase the natural flavors and freshness of each element. This emphasis on seasonality not only elevates the flavor of their dishes but also encourages sustainable cooking habits.
Whether you are an experienced chef or a kitchen beginner, A Couple Cooks has something for everyone. With their inviting style and focus on the joy of cooking, Alex and Sonja invite you to embark on a culinary adventure that honors the art of preparing and sharing good food. Delve into their recipe collection and uncover the simple joys of cooking with care and purpose.
Read More
A Handbook to 25 Essential Tequila Drink Recipes
Recipes by Alex & Sonja
Introducing Alex and Sonja Overhiser, the energetic pair behind the beloved food blog “A Couple Cooks.” As cookbook writers, active parents, and a real couple, they have been sharing their culinary experiences with the world since 2010. Their blog is a valuable resource of uncomplicated, seasonal recipes that are not just tasty but also encourage healthy eating habits. With an emphasis on making cooking approachable and enjoyable, Alex and Sonja have motivated countless home cooks to relish the pleasure of creating meals from scratch.
Their adventure started with a mutual love for food and a wish to assist others in uncovering the advantages of home cooking. Throughout the years, they have crafted a diverse range of recipes that satisfy various tastes and dietary needs. From filling breakfasts to fulfilling dinners, their assortment encompasses everything from plant-based meals to decadent desserts, guaranteeing there’s something for everyone.
A standout aspect of Alex and Sonja’s philosophy is their focus on utilizing seasonal ingredients. By prioritizing what’s fresh and in season, they not only amplify the taste of their dishes but also advocate for sustainable eating habits. This dedication to seasonality is clear in their colorful salads, comforting soups, and imaginative main courses that honor the bounty of each season.
Besides their recipes, Alex and Sonja provide insightful meal planning advice that aids busy families in overcoming the challenges of preparing nutritious meals amidst chaotic schedules. Their practical tips on batch cooking, ingredient preparation, and time-saving methods empower readers to integrate cooking naturally into their everyday lives.
Every recipe on “A Couple Cooks” is carefully tested and photographed by Alex and Sonja themselves, guaranteeing that each dish is not only visually enticing but also reliable. Their two children frequently act as the ultimate taste testers, giving their stamp of approval for family-friendly meals that both children and adults will enjoy.
Whether you’re an experienced cook or just beginning your culinary adventure, Alex and Sonja’s blog provides a wealth of inspiration and support. With their friendly approach and authentic passion for food, they welcome you to join them in the kitchen and experience the joy of cooking together.
Read More